The coffee is reheated swill from yesterday in a La Vache Qui Rit marigold yellow mug. The music is Bruce Springsteen's “Thunder Road” from Live 1975-1985. Piano so beautiful it hurts. I did manage to put on, well, not clothes but at least a full-body cover-up before racing down to the studio this morning to see how the firing turned out. It was wild--and completely unexpected.
Kiln: Skutt clamshell
kilnposts: Four 1/2" squares of mullite
Shelf: 20 X 20 X 1 mullite
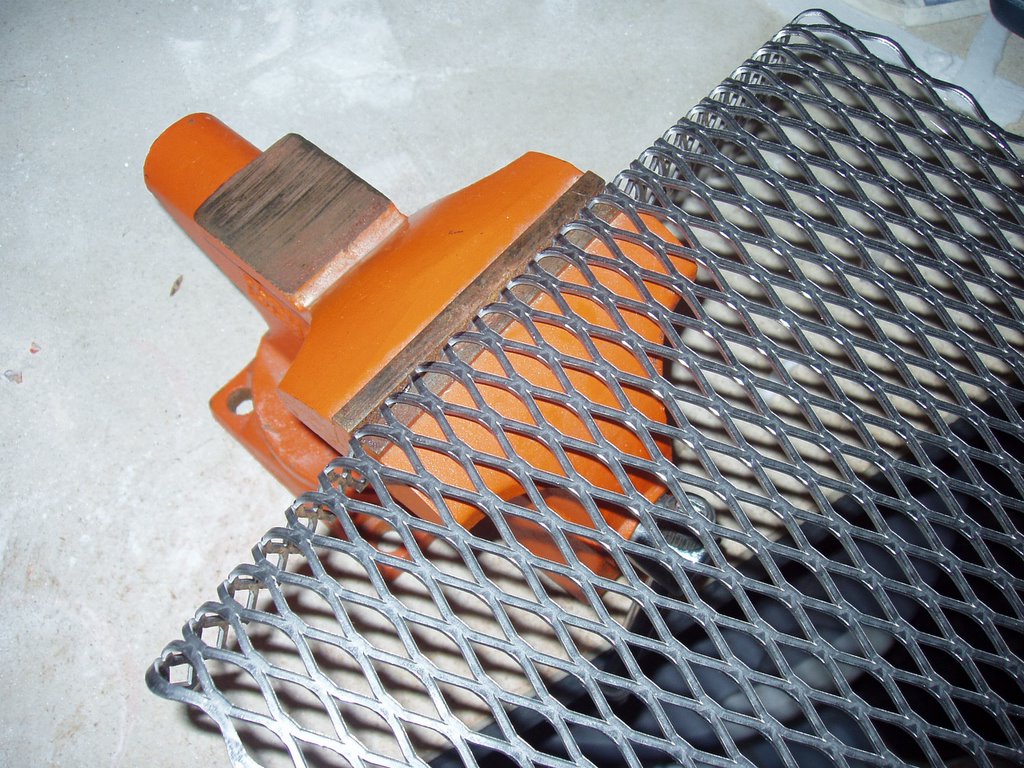
Stand: 1” square tube steel legs 7” long
Configuration: The shelf was on the posts 1/2" off the floor of the kiln, the stand stood on the shelf--not the floor of the kiln--giving a full 7" drop between the mesh and the shelf. The thermocouple was between the bottom of the stand and the shelf.
Mesh: Hi-temp grill screen overlapped in the middle and folded down across the sides of the stand
Shelf Release: Hotline Hi Fire Primer 15-20 coats brushed on with a Haik brush
Glass: Bullseye red, orange and yellow opal and cathedral (should have taken a weight here to predict final piece size, but there was so much waste in this project it wouldn’t have mattered!)
Schedule: based on Steve Immerman’s aperture pour schedule.
600 dph to 1700 hold 90
AFAP to 1500 hold 45
AFAP to 960 hold 60
100 DPH to 650 hold 0
Natural cool
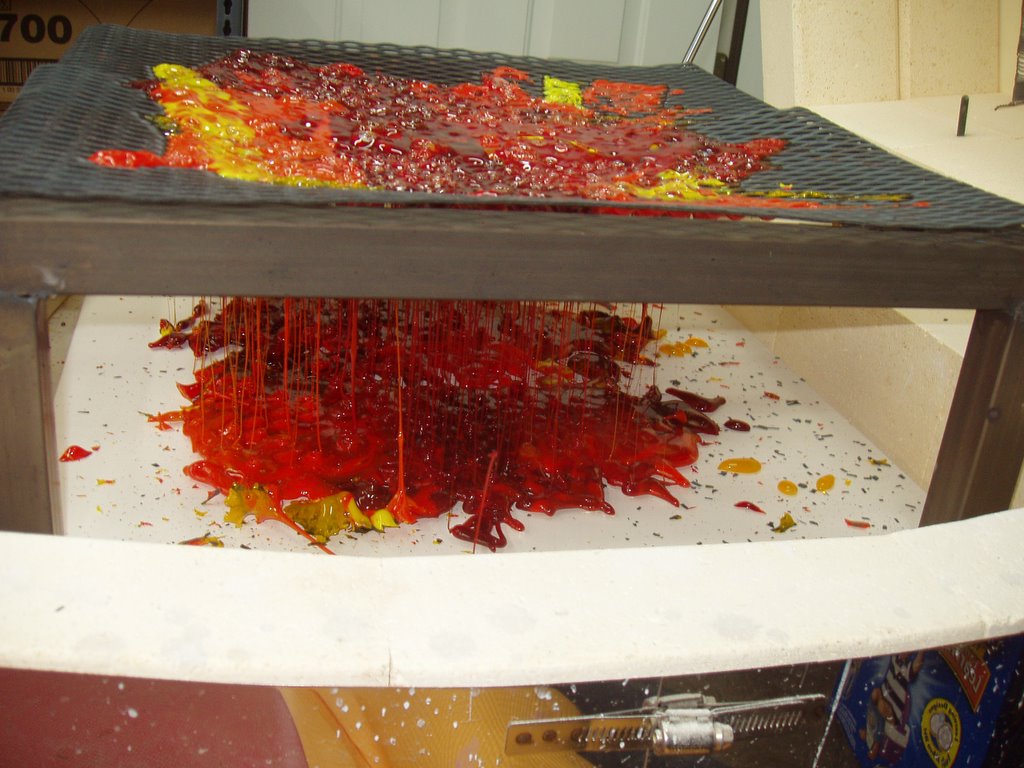
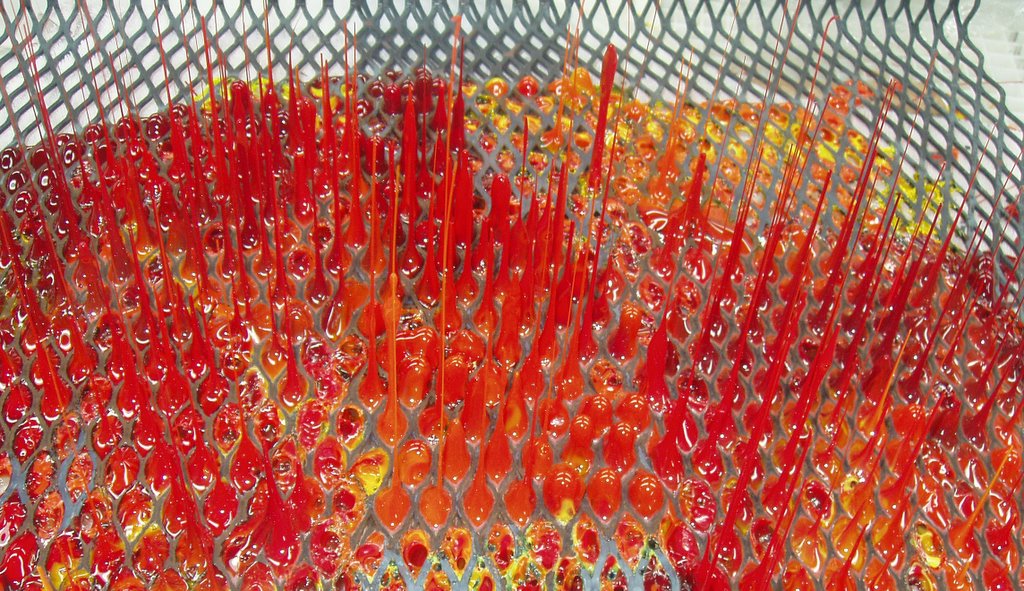
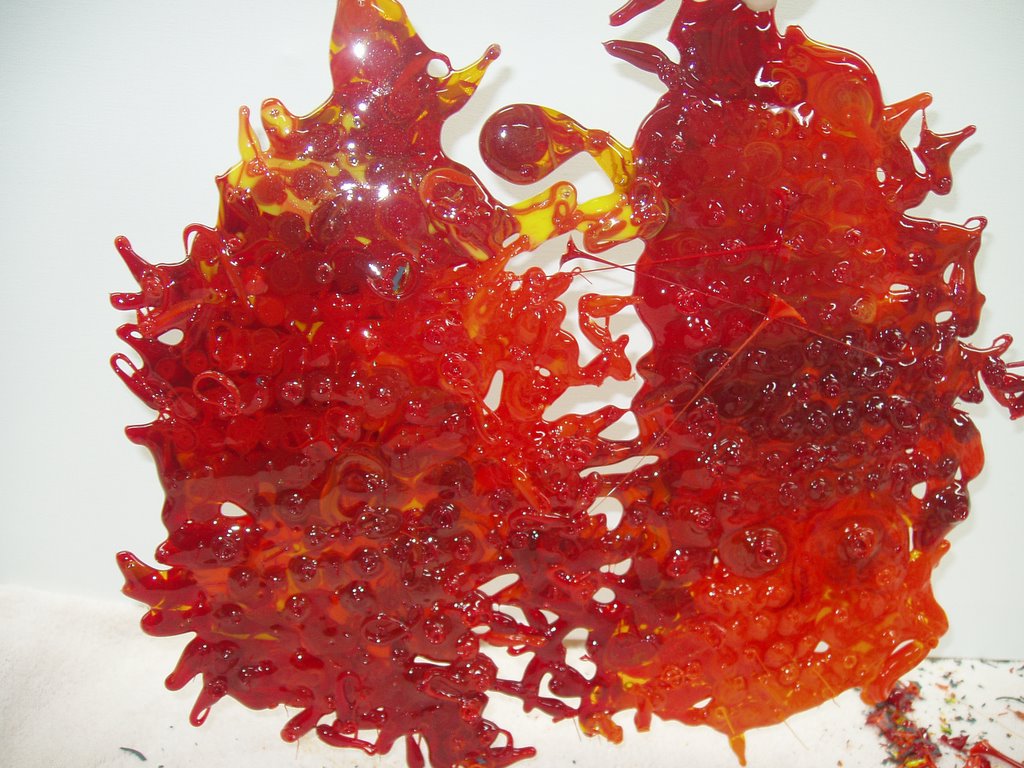
So where to begin on the unexpectednesses... Well, the first thing that startled me was how much glass was left on top of the screen. Yes, this is a flat-blade mesh rather than a wire-mesh, but due to the height of the set-up and the closeness of the glass to the elements, I really expected it to melt and pour. But a huge amount stuck to the screen.
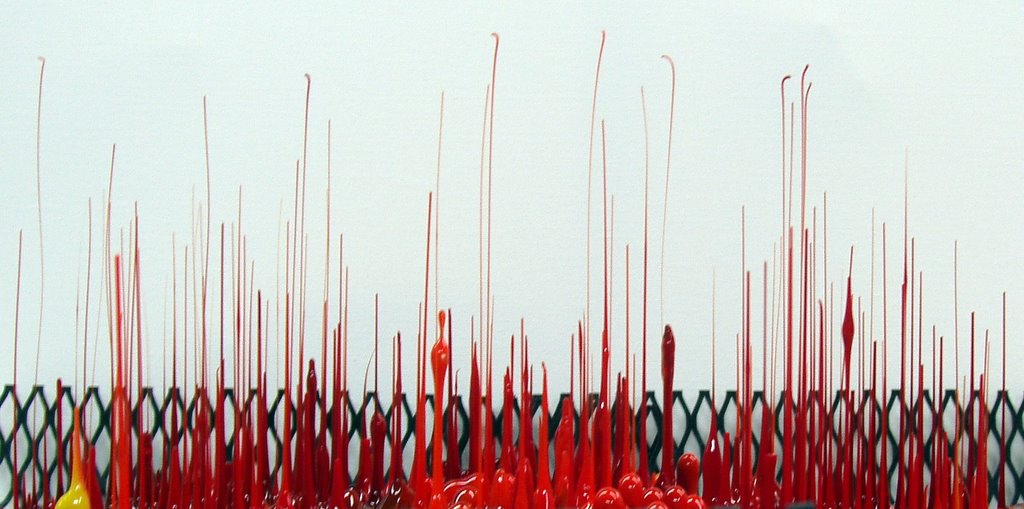
 Given the amount of glass on the top I should have expected all the threads between the mesh and the piece below, and therefore been prepared for the strength of the bond between the mesh and the puddle below. I wasn't and was very surprised when I went to lift the stand away and the whole thing came up in my hands. I asked my spouse to lift it so I could photograph it for posterity here.
I blithely ignored the possibility of the metal reacting to the heat and was unpleasantly surprised by the amount of oxidation which flaked off into the glass. I am not sure if it was a one-time thing or not, but the point is moot as I will not try this with a screen gauge this big again. I also got far more popped bubbles in the final surface than I expected.
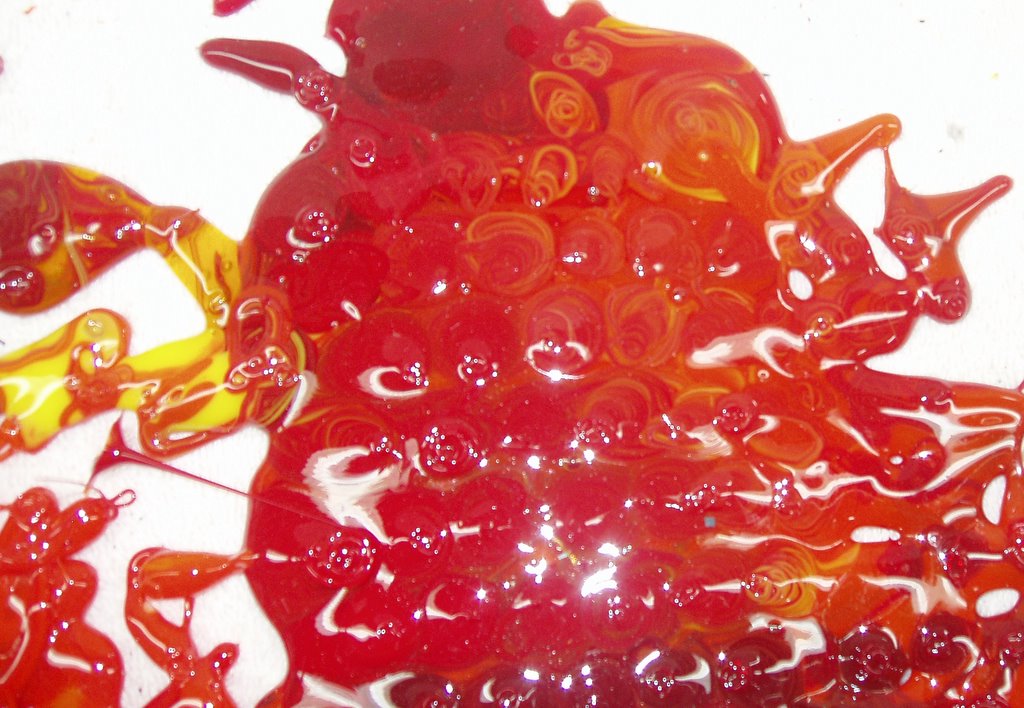
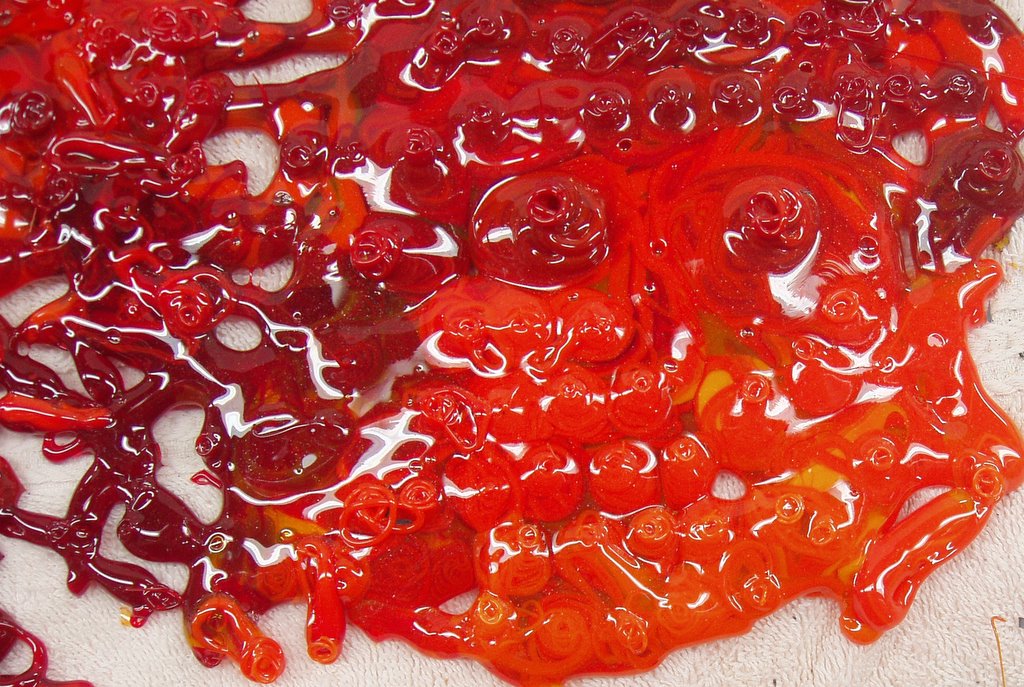
What I really liked about this technique was the number of small whirlpool areas. With aperture pours/pot melts, you get one contact point with rings of color rippling out from it. Here every drop point produces its own ripple and color blend area and is an opporunity for a central design element in a larger piece.
So what am I going to change for next time? I am going to use the 1/2" square wire mesh. It is much more flexible than the mesh I used this time so I will need to wire it to the stand to keep it from collapsing in the middle. I am going to put the stand on the floor of the kiln and raise the shelf up a bit by putting it on 1" posts. And I am going to weigh my glass. I am also going to use clear in the mix to get more of a "window" effect. I close with some random photos from the experiment.


2 comments:
So, are you happy, intrigued, upset about what occured? It sounds interesting...
I am intrigued and challenged! I can't wait to go at it again--with a few modifications. I log every firing I do (and have for 19 years) and each time I do an experiment which does not turn out as I intended, I repeat it and tweak it until I get what I want. What I want could either be what I originally intended or something better.
Post a Comment